Securing Your Next.js App with WebAuthn: A Passwordless Login Experience

In today’s security-conscious world, robust user authentication remains paramount. Traditional passwords are vulnerable to phishing attacks and data breaches. This blog post explores how to leverage WebAuthn for passwordless login within a Next.js application utilising the App Router. We’ll walk through the core functionalities, showcasing a secure and user-friendly login experience.
Understanding WebAuthn
WebAuthn, a W3C standard, empowers secure web authentication through public-key cryptography. It eliminates the need for passwords, relying instead on a combination of usernames and biometric verification fingerprint scan or security keys. This significantly strengthens login security and streamlines the user experience.
Implementing WebAuthn in Next.js
Our Next.js application will leverage WebAuthn to achieve passwordless login. Here’s a breakdown of the key steps involved:
1. Project Setup and Dependencies:
- Create a new Next.js application using
npx create-next-app my-webauthn-appcd my-webauthn-app - Install the required dependencies:
npm install @simplewebauthn/browser @simplewebauthn/server
2. Registration Flow (/register route):
On the /register route, the user creates an account with a username. The application then prompts the user’s device (phone, computer) for a biometric scan or security key registration. WebAuthn generates a public/private key pair on the device. The public key is stored on the server, while the private key remains securely on the user’s device.

Client side
Inside the ‘app’ folder create another folder name ‘register’ and inside it create a file named ‘page.js’. Inside that file write the following code.
"use client";

import { useState } from "react";

import { startRegistration } from "@simplewebauthn/browser";
export default function Register() {
const [username, setUsername] = useState(“”);const handleRegister = async () => {
const optionsResponse = await fetch(“/api/register”, {
method: “POST”,
headers: {
“Content-Type”: “application/json”,
},
body: JSON.stringify({ username }),
});const options = await optionsResponse.json();
const attestationResponse = await startRegistration(options.data);
await fetch(“/api/register”, {
method: “PUT”,
headers: {
“Content-Type”: “application/json”,
},
body: JSON.stringify({ username, attestationResponse }),
});
};return (
<>
<h1>Register</h1>
<input
type=”text”
value={username}
onChange={(e) => setUsername(e.target.value)}
placeholder=”Username”
/>
<button onClick={handleRegister}>Register</button>
</>
);
}
Server side
Inside the ‘app’ folder create another folder name ‘api’ and inside it create another folder named ‘register’, then inside this folder create another file named ‘route.js’. Inside that file write the following code.
import {

generateRegistrationOptions,

verifyRegistrationResponse,

} from "@simplewebauthn/server";

import { NextApiRequest, NextApiResponse } from "next";

import { isoUint8Array } from "@simplewebauthn/server/helpers";
const rpName = “Testing Application”; // Change this to your application name
const rpID = “localhost”; // Change this to your domain
const origin = “http://localhost:3000/“; // Change this to your URLlet userDatabase = {}; // For now we can you static data registered, later a database can be used for this
export async function POST(req) {
const incomingData = await req.json();
const username = incomingData.username;
if (!username) {
return Response.json({ error: “Username is required” });
}// Generate options for the user to start registration
const options = await generateRegistrationOptions({
rpName,
rpID,
userID: isoUint8Array.fromUTF8String(username),
userName: username,
attestationType: “none”,
});// Store the options in our ‘database’
userDatabase[username] = {
…userDatabase[username],
challenge: options.challenge,
};return Response.json({
message: “Data received and decrypted”,
data: options,
});
}export async function PUT(req) {
const incomingData = await req.json();
const { username, attestationResponse } = incomingData;
const expectedChallenge = userDatabase[username]?.challenge;if (!username || !attestationResponse || !expectedChallenge) {
return Response.json({ error: “Invalid request” });
}try {
const verification = await verifyRegistrationResponse({
response: attestationResponse,
expectedChallenge,
expectedOrigin: origin,
expectedRPID: rpID,
});if (verification.verified) {
// Save the credential in our ‘database’
userDatabase[username] = {
…userDatabase[username],
credential: verification.registrationInfo,
};
return Response.json({ success: true });
}return Response.json({ error: “Verification failed” });
} catch (error) {
console.log(“error => “, error);
return Response.json({ error: error.message });
}
}
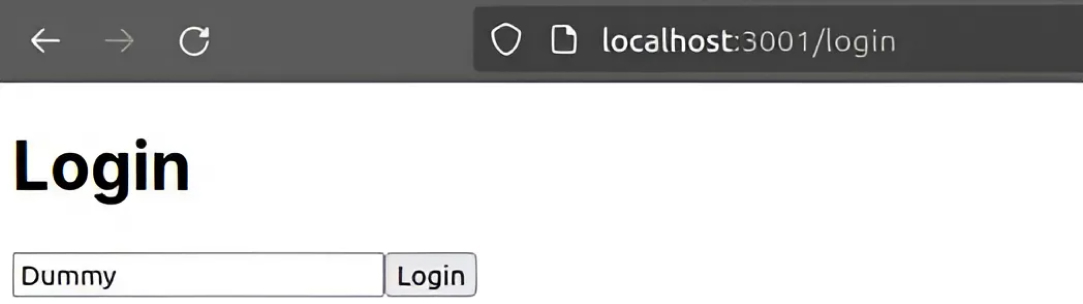
3. Login Flow (/login route):
On the /login route, the user enters their username. The application initiates a WebAuthn challenge, requesting user authentication via biometrics or the security key. The user’s device leverages the private key to sign the challenge, demonstrating possession of the valid credential. The signed response is sent back to the server.
Client side
Inside the ‘app’ folder create another folder named ‘login’ and inside it create a file named ‘page.js’. Inside that file write the following code.
"use client";

import { useState } from "react";

import { startAuthentication } from "@simplewebauthn/browser";
export default function Login() {
const [username, setUsername] = useState(“”);const handleLogin = async () => {
const optionsResponse = await fetch(“/api/login”, {
method: “POST”,
headers: {
“Content-Type”: “application/json”,
},
body: JSON.stringify({ username }),
});const options = await optionsResponse.json();
const assertionResponse = await startAuthentication(options);
const loginResponse = await fetch(“/api/login”, {
method: “PUT”,
headers: {
“Content-Type”: “application/json”,
},
body: JSON.stringify({ username, assertionResponse }),
});if (loginResponse) {
alert(“Login successful”);
} else {
alert(“Login failed”);
}
};return (
<div>
<h1>Login</h1>
<input
type=”text”
value={username}
onChange={(e) => setUsername(e.target.value)}
placeholder=”Username”
/>
<button onClick={handleLogin}>Login</button>
</div>
);
}
Server side
Inside the ‘api’ folder create another folder named ‘login’, then inside this folder create another file named ‘route.js’. Inside that file write the following code.
import {

generateAuthenticationOptions,

verifyAuthenticationResponse,

} from "@simplewebauthn/server";
const rpID = “localhost”; // Change this to your domain
const origin = “http://localhost:3000/“; // Change this to your URLlet userDatabase = {}; // For now we can you static data registered, later a database can be used for this
export async function POST(req) {
const incomingData = await req.json();
const username = incomingData.username;
const user = userDatabase[username];
if (!user || !user.credential) {
return Response.json({ error: “User not found” });
}const options = await generateAuthenticationOptions({
rpID,
allowCredentials: [
{
id: user.credential.credentialID,
type: “public-key”,
transports: [“usb”, “ble”, “nfc”, “internal”],
},
],
});// Store the challenge in our ‘database’
userDatabase[username] = {
…userDatabase[username],
challenge: options.challenge,
};return Response.json(options);
}export async function PUT(req) {
const incomingData = await req.json();
const { username, assertionResponse } = incomingData;
const user = userDatabase[username];
const expectedChallenge = user?.challenge;if (!username || !assertionResponse || !expectedChallenge) {
return Response.json({ error: “Invalid request” });
}try {
const verification = await verifyAuthenticationResponse({
response: assertionResponse,
expectedChallenge,
expectedOrigin: origin,
expectedRPID: rpID,
authenticator: user.credential,
});if (verification.verified) {
return Response.json({ success: true });
}
return Response.json({ error: “Verification failed” });
} catch (error) {
console.log(“error =>”, error);
return Response.json({ error: error.message });
}
}
4. Verification:
Run the following command to run the application.
npm run dev
Please visit localhost:3000/register in your browser and register yourself there, once done visit localhost:3000/login to login yourself on the same device, with the same username and the same biometric.
Upon receiving the signed response, the server verifies it with the public key associated with the user’s username. Successful verification confirms the user’s identity and grants access to the application. A success message is displayed to the user.
Benefits of a Passwordless Login
This WebAuthn integration offers several advantages:
- Enhanced Security: Eliminating passwords reduces the risk of phishing attacks and data breaches.
- Improved User Experience: Biometric authentication is faster and more convenient than passwords.
- Platform Agnostic: WebAuthn functions across various devices and browsers, promoting wider accessibility.
Conclusion
By incorporating WebAuthn into your Next.js application, you provide a more secure and user-friendly login experience. This blog post has provided a foundational understanding of WebAuthn and its implementation within a Next.js application. Remember, this is a simplified overview, and further exploration of the WebAuthn API and security best practices is recommended for a robust implementation.
At LN Webworks, our team of seasoned experts is always ready to assist you with your digital needs. Contact us today to schedule your free consultation!
Author