How To Integrate A Web3 Wallet Into Next.js Using Rainbow Kit

This guide on How To Integrate A Web3 Wallet Into Next.js Using Rainbow Kit. LN Webworks walks through each step of the process in practical, replicable terms. Next.js provides a reliable foundation for building React applications, and Rainbow Kit offers a structured approach to adding Web3 wallet connectivity without unnecessary complexity. Whether you are building a decentralized application or adding wallet support to an existing Next.js project, this guide provides a clear path from setup to a working implementation.
Next.js is a powerful framework known for its robust features in crafting React applications and provides developers with an excellent framework for crafting dynamic and engaging web experiences. Injecting creativity into Next.js projects becomes simple with tools like Rainbow Kit, enabling effortless integration of vibrant and colorful elements. In this guide, we will take you through the straightforward process of leveraging Rainbow Kit within your Next.js applications to infuse them with captivating visuals.
Next.js is a framework that simplifies server-side rendering and static site generation for React applications. This characteristic makes it a preferred choice for developers looking to enhance web performance and deliver superior user experiences. Rainbow Kit refers to a toolkit that simplifies the integration of vibrant and colorful elements into applications, enhancing user engagement.
Step By Step Guide How To Integrate A Web3 Wallet Into Next.js Using Rainbow Kit
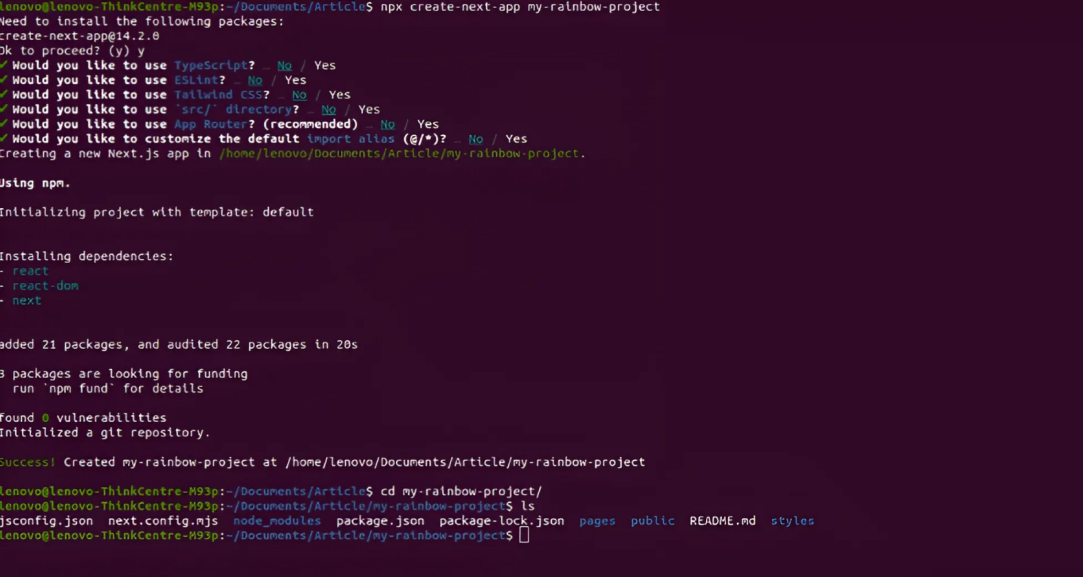
Step 1: Setting Up a Next.js Project with Page Router
Before using Rainbow Kit, let us set up a Next.js project. If you have not already installed Node.js and npm, make sure to do so before proceeding. Then, open your terminal and run the following commands:
- npx create-next-app my-rainbow-project
- cd my-rainbow-project
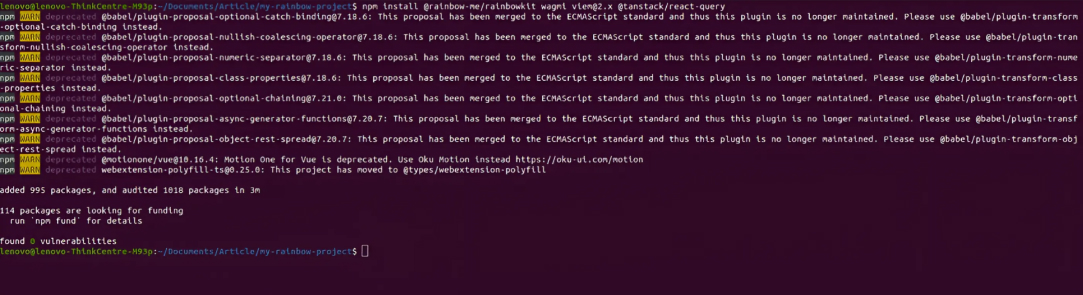
Step 2: Installing Rainbow Kit
Next, let us install Rainbow Kit into our project. In your terminal, run the following command:
- npm install @rainbow-me/rainbowkit wagmi viem@2.x @tanstack/react-query
Web3 wallet integration in Next.js applications enables secure and seamless interactions with blockchain networks, enhancing decentralized application functionality. This integration is crucial for developers aiming to build applications with blockchain capabilities, providing users with a secure and intuitive experience.
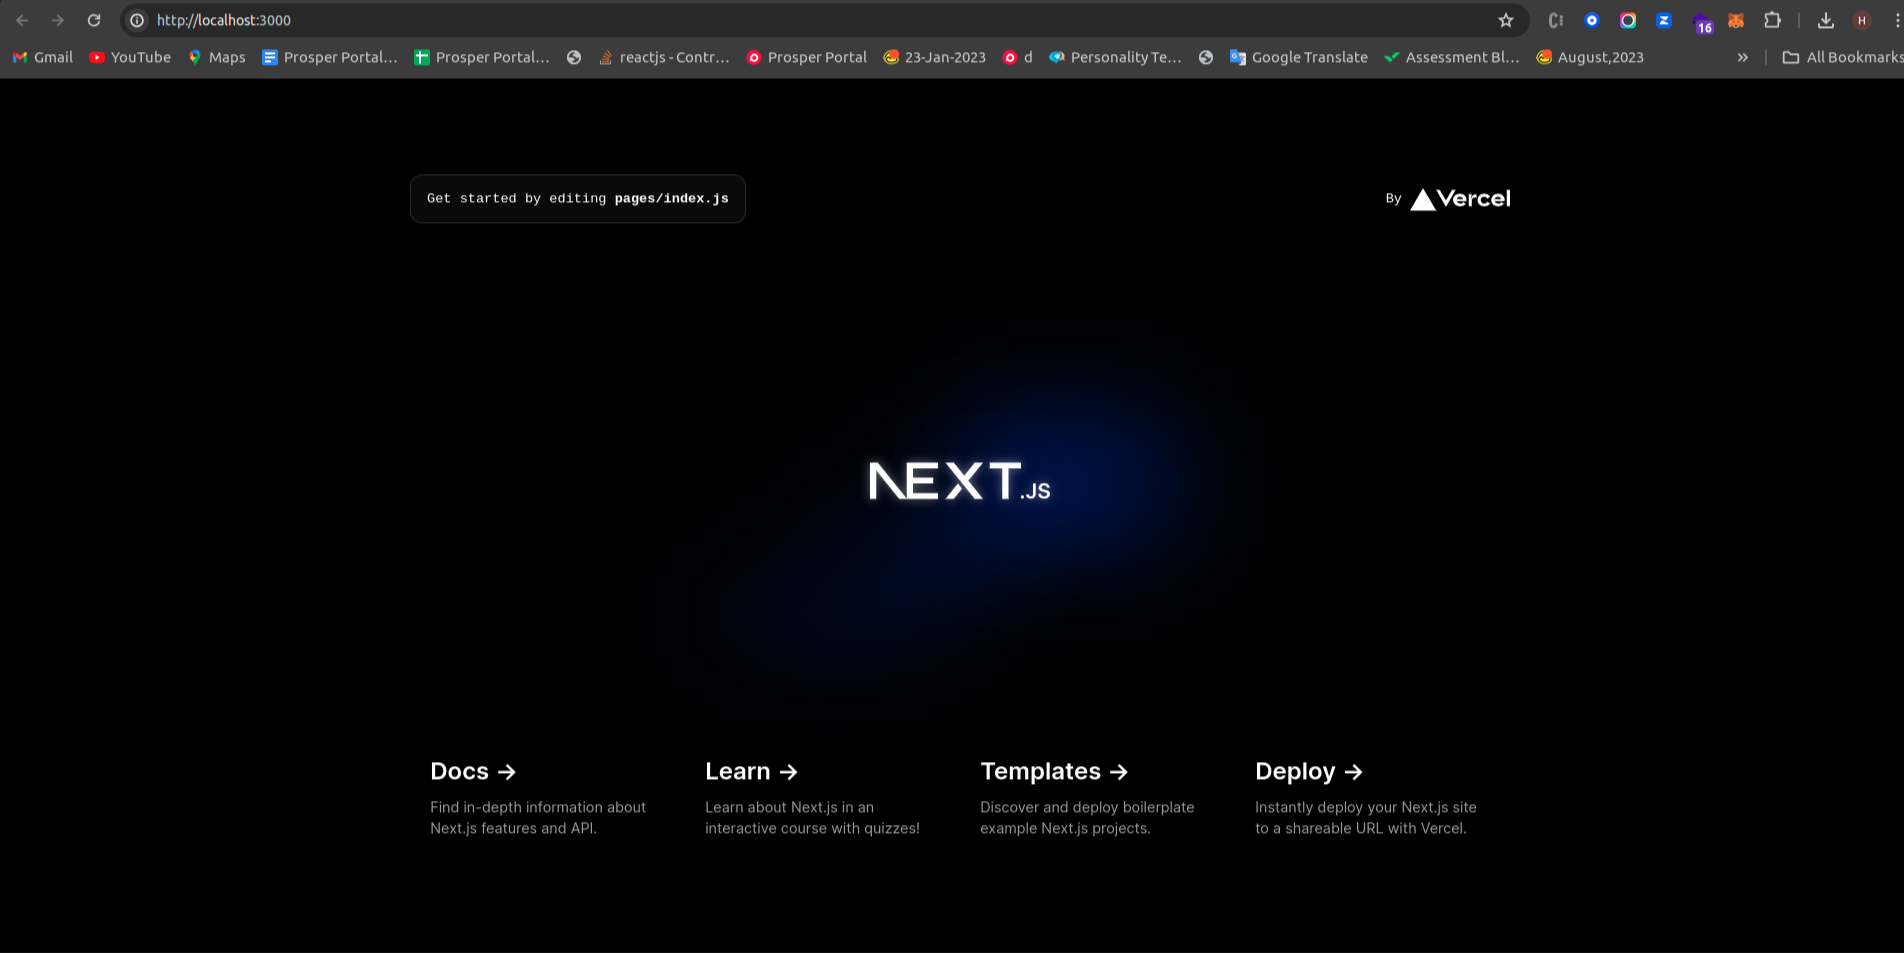
Step 3: Running Your Next.js Application
Once you have added Rainbow Kit components to your Next.js application, it is time to confirm the setup is working as expected. This step is a practical checkpoint in the process of learning how to integrate a Web3 wallet into Next.js using Rainbow Kit, as outlined in this guide by LN Webworks. In your terminal, navigate to your project directory and run the following command:
- npm run dev
This command will start your Next.js development server. Open your web browser and navigate to http://localhost:3000 to view your running application and verify that the Rainbow Kit components are rendering correctly.
Next.js offers support for server-side rendering and static site generation, essential for Web3 wallet integration in modern web applications. This support ensures developers can deliver efficient and scalable solutions while maintaining a high level of security and performance.
Step 4: Modify the code in the _app.js file within the pages/ directory
_app.js file
import ‘@rainbow-me/rainbowkit/styles.css’;
import { getDefaultConfig, RainbowKitProvider } from ‘@rainbow-me/rainbowkit’;
import { WagmiProvider } from ‘wagmi’;
import { mainnet, polygon, optimism, arbitrum, base } from ‘wagmi/chains’;
import { QueryClientProvider, QueryClient } from “@tanstack/react-query”;
const config = getDefaultConfig({
appName: ‘My RainbowKit App’,
projectId: ‘YOUR_PROJECT_ID’,
chains: [mainnet, polygon, optimism, arbitrum, base],
ssr: true,
});
const queryClient = new QueryClient();
export default function App({ Component, pageProps }) {
return (
<Component {…pageProps} />
);
}
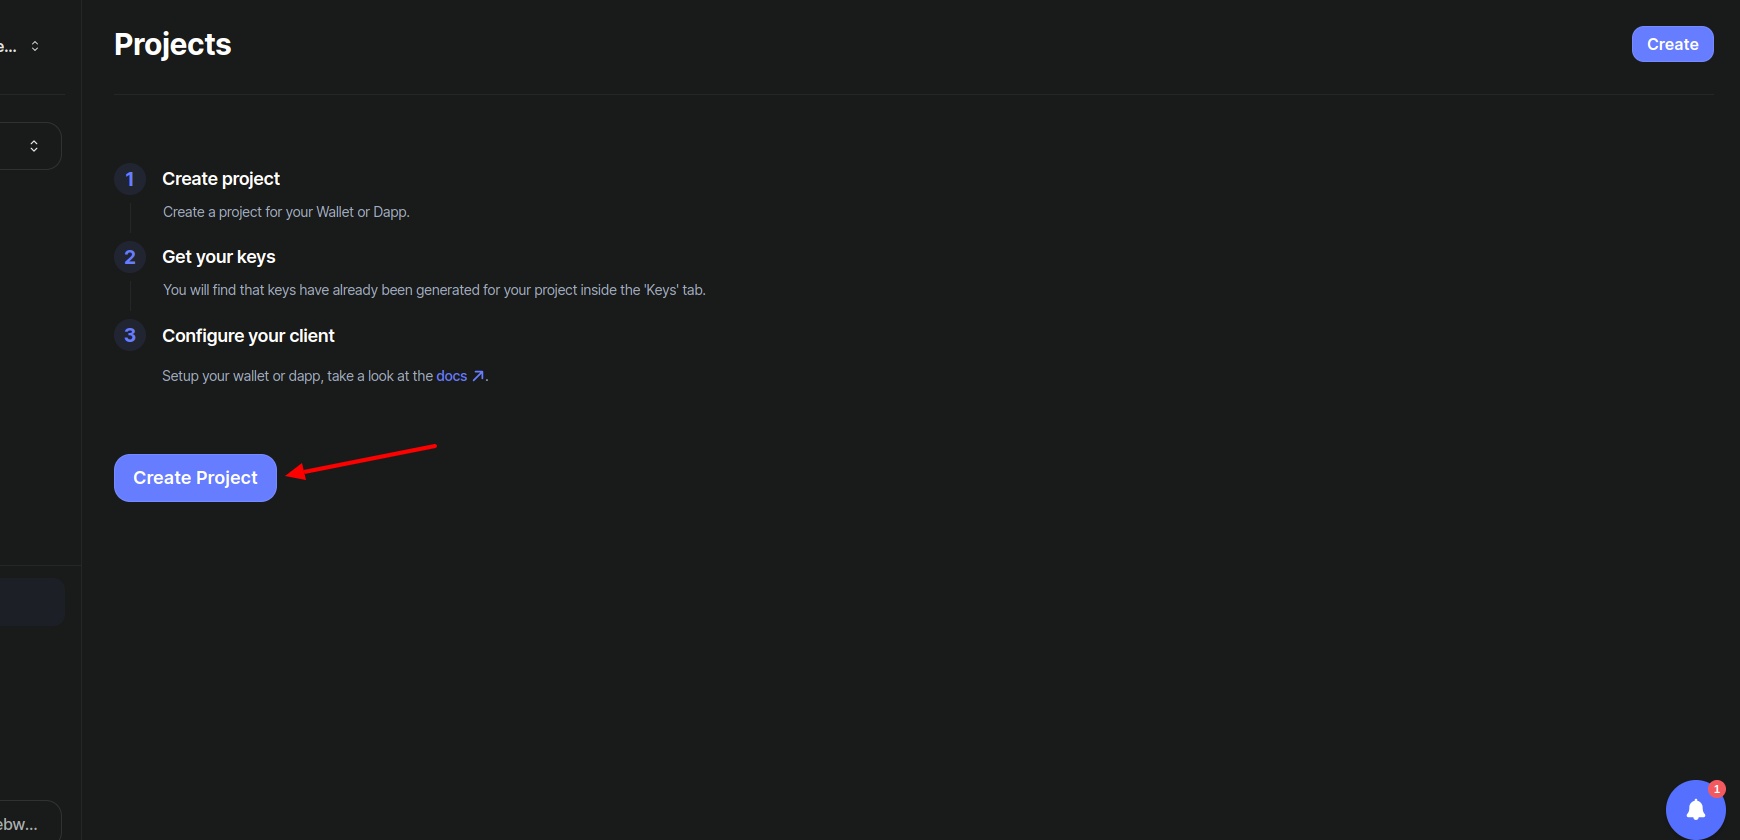
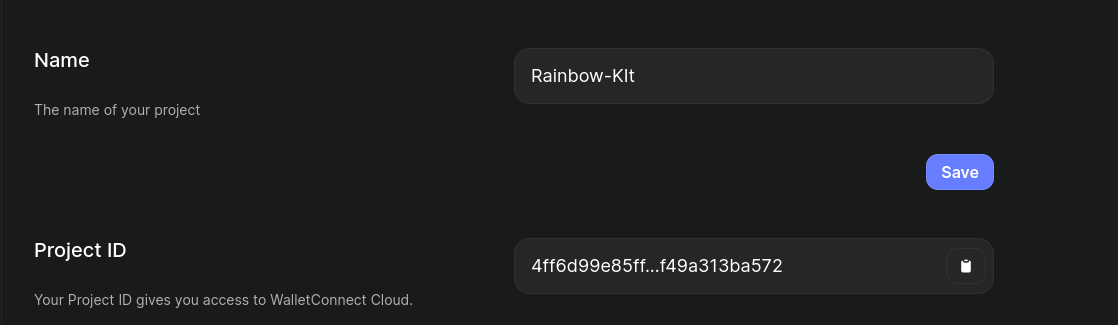
Step 5: Get projectId at https://cloud.walletconnect.com/sign-up
appName: ‘My RainbowKit App’,
projectId: ‘YOUR_PROJECT_ID’,
- Open https://cloud.walletconnect.com/sign-up this URL
- Fill in all valid details to create a new account
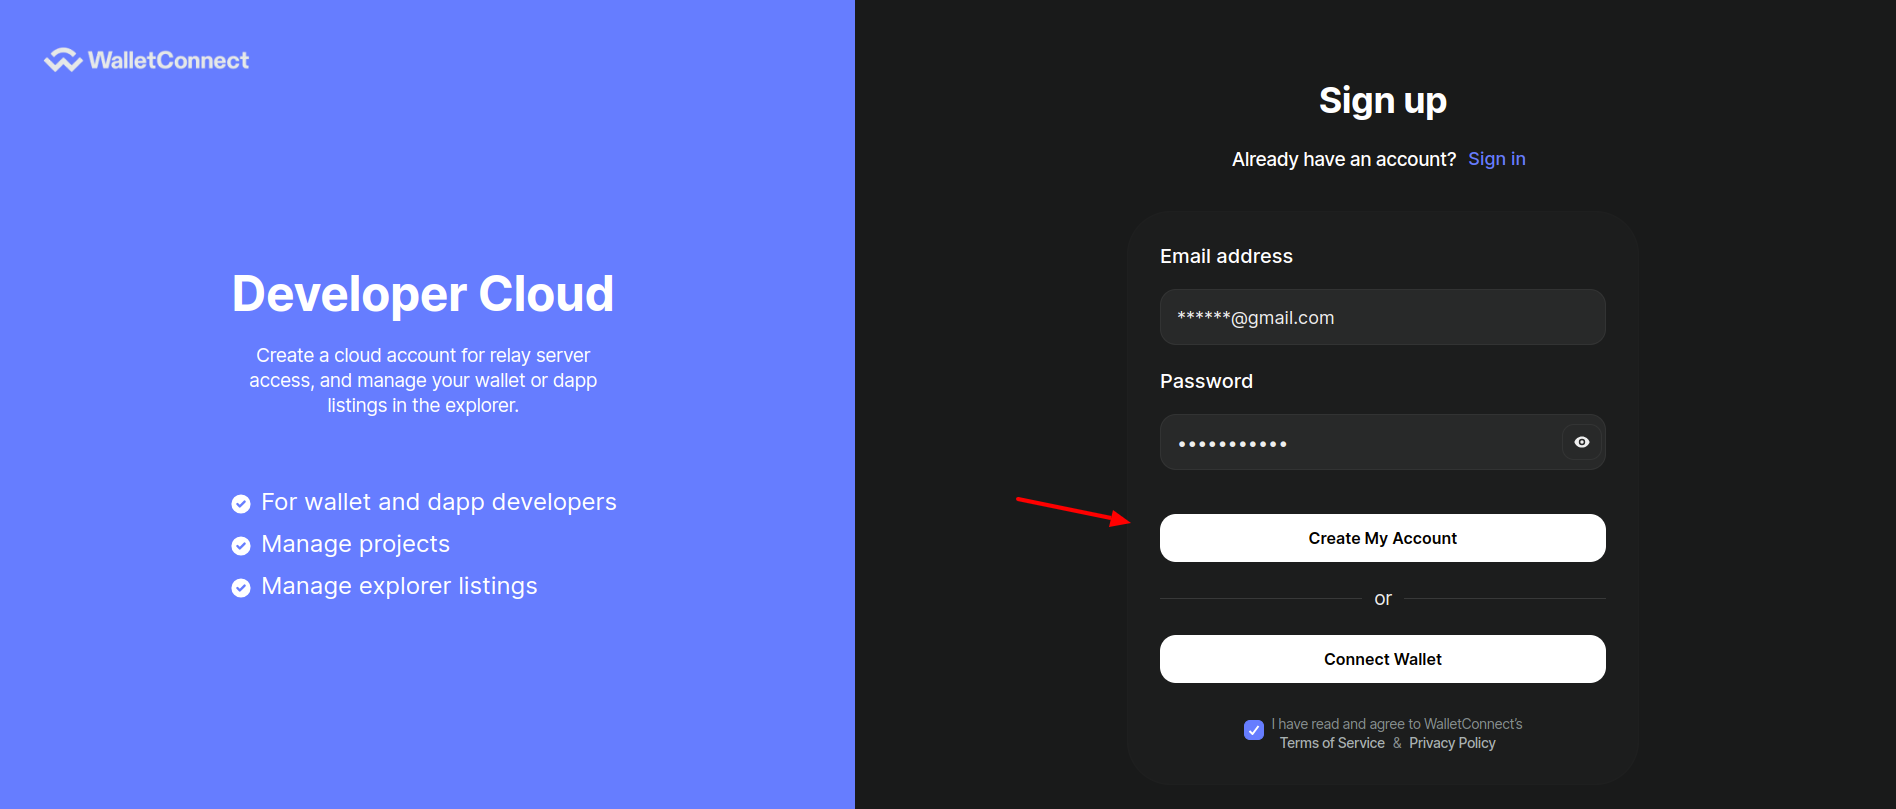
- Then log in to this platform to Get projectId.
- After sign in, you will see this landing page & click on the Create Project button
- Then Add your project information:
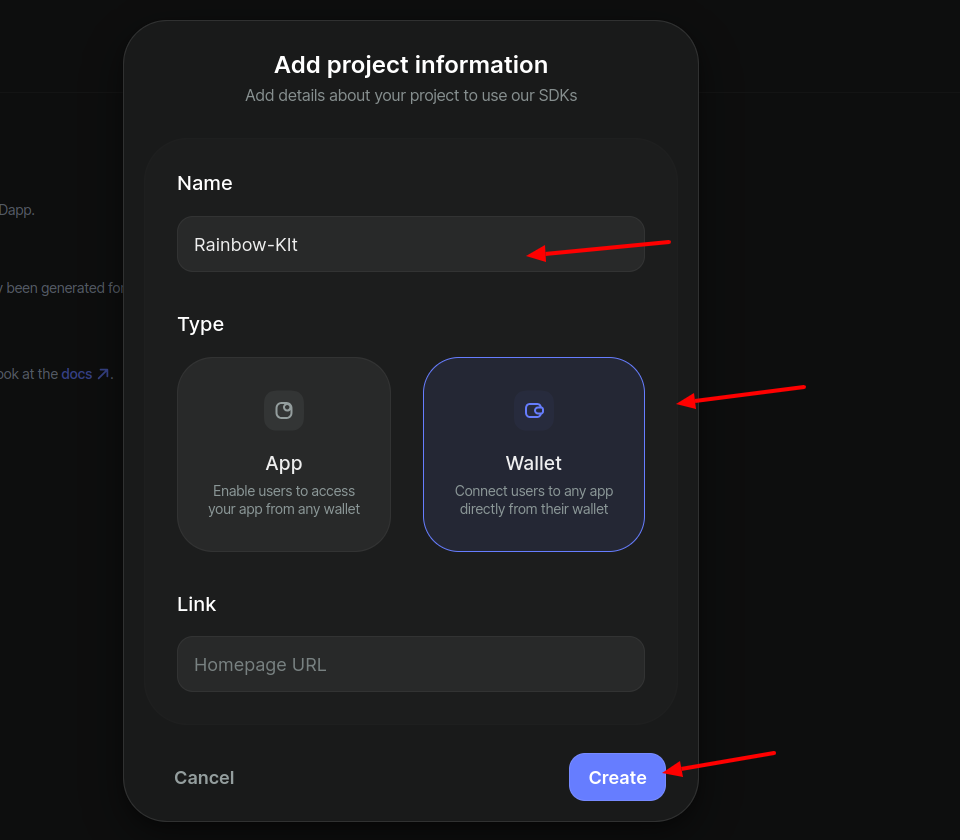
- Now, you will replace this projectID and name with your appName: ‘ My RainbowKit App ‘, projectId: ‘ YOUR_PROJECT_ID ‘, in _app.js file
Step 6: Modify the code in the index.js file within the pages/ directory
index.js file
import React from “react”;
import { ConnectButton } from “@rainbow-me/rainbowkit”;
const index = () => {
return ;
};
export default index;
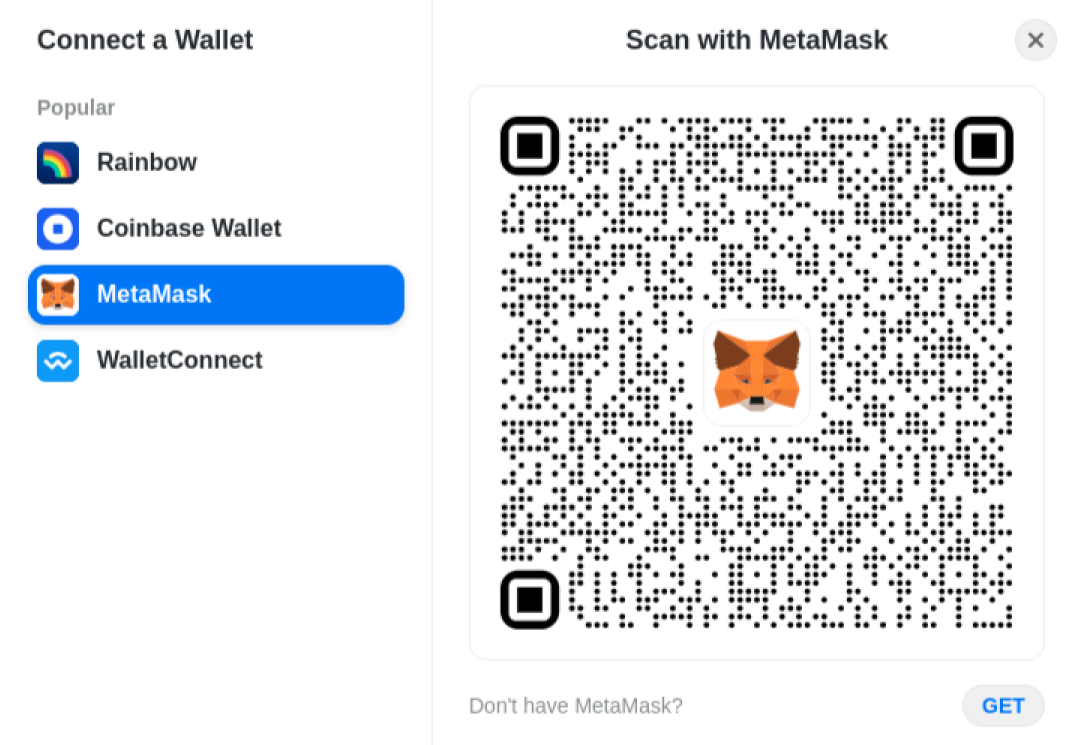
Finally, Now check http://localhost:3000 to see your Next.js application enriched with Rainbow Kit and integrated with a Web3 wallet for a vibrant and seamless user experience.
In Conclusion
Next.js, renowned for its robust features in crafting React applications, offers developers an exceptional framework for building dynamic and engaging web experiences. In this guide, we have outlined a step-by-step process for leveraging Rainbow Kit within your Next.js applications to infuse them with captivating visuals and seamlessly integrate a Web3 wallet.
LN Webworks expert team is ready to tailor solutions that meet your every need. Reach out to us now for project excellence and discover how we can help you with your web development projects.