How To Render A Custom Form In Drupal Block

Blocks are basically content containers that are showcased in distinct sections of a website including social sharing buttons, “Who’s online” sections, recently viewed content, and social media feeds. Custom Blocks that are available through GUI operate similarly to node entities. In this guide, you will get a concise overview of their implementations, but primarily focusing on custom blocks developed through the creation of a custom module in Drupal development services.
Step-by-Step Guide To Displaying Custom Forms In Drupal Blocks
Step 1: Create a Custom Module
Create a directory first by using the following command: =>
mkdir modules/custom/mymodule
Create the Necessary Files
Within the modules/custom/mymodule directory, create the following files:
mymodule.info.yml

src/Plugin/block/CistomBlock.php

src/Form/MyCustomForm.php
Ensure that these files are properly structured to fit the requirements of your module.
1. mymodule.info.yml
The mymodule.info.yml file is the metadata file for your Drupal module. It provides essential information to Drupal about the module, including its name, description, core compatibility, and dependencies.
2. src/Plugin/Block/CustomBlock.php
The CustomBlock.php file defines a custom block plugin for Drupal. Blocks are pieces of content or functionality that can be placed in various regions of a Drupal theme. Custom blocks allow you to create reusable content or functionality that site administrators can place on pages or regions.
3. src/Form/MyCustomForm.php
The MyCustomForm.php file defines a custom form using Drupal’s Form API. Custom forms allow you to create interactive forms that users can submit, providing custom functionality or data collection.
Step 2: Define the Form Class
Certainly! Below are the detailed steps to define a custom form class in Drupal, specifically creating the MyCustomForm.php file inside the src/Form directory of your module.
Step-By-Step Guide To Creating A Custom Form
Step 1: Create the Directory Structure
- Navigate to your module directory: cd modules/custom/mymodule
- Create the src/Plugin/Block directory if it doesn’t already exist:
Step 2: Create the Form Class File
- Create a new file named MyCustomForm.php inside the src/Form directory:
- Open the file in a code editor (e.g., VSCode, Sublime Text, or your preferred editor).
- Define the form class in MyCustomForm.php:
Copy and paste the following code into MyCustomForm.php:
<?php

namespace DrupaldummyForm;

use DrupalCoreFormFormBase;

use DrupalCoreFormFormStateInterface;

/**

 * Provides a dummy form.

 */

final class MyCustomForm extends FormBase {

  /**

   * {@inheritdoc}

   */

  public function getFormId(): string {

    return 'dummy_example';

  }
/**
* {@inheritdoc}
*/
public function buildForm(array $form, FormStateInterface $form_state): array {
$form['message'] = [
'#type' => 'textarea',
'#title' => $this->t('Message'),
'#required' => TRUE,
];
$form['actions'] = [
'#type' => 'actions',
'submit' => [
'#type' => 'submit',
'#value' => $this->t('Send'),
],
];
return $form;
}
/**
* {@inheritdoc}
*/
public function validateForm(array &$form, FormStateInterface $form_state): void {
}
/**
* {@inheritdoc}
*/
public function submitForm(array &$form, FormStateInterface $form_state): void {
$this->messenger()->addStatus($this->t('The message has been sent.'));
}
}
Step 3: Create a Custom Block
Certainly! Here’s a detailed guide on creating a custom block in Drupal. This involves defining a block plugin class in CustomBlock.php inside the src/Plugin/Block directory of your custom module.
Step-By-Step Guide To Creating A Custom Block
Step 1: Create the Directory Structure
- Navigate to your module directory: cd modules/custom/mymodule
- Create the src/Plugin/Block directory if it doesn’t already exist.
Step 2: Create the Custom Block File
- Create a new file named CustomBlock.php inside the src/Plugin/Block directory:
- Open the file in a code editor (e.g., VSCode, Sublime Text, or your preferred editor).
Step 3: Define the Block Class
Add the following code to CustomBlock.php:
<?php

namespace DrupaldummyPluginBlock;

use DrupalCoreBlockBlockBase;

use DrupalCoreFormFormBuilderInterface;

use DrupalCorePluginContainerFactoryPluginInterface;

use SymfonyComponentDependencyInjectionContainerInterface;

/**

 * Provides a custom block with an embedded form.

 *

 * @Block(

 *   id = "my_custom_block_with_form",

 *   admin_label = @Translation("My Custom Block with Form"),

 *   category = @Translation("Custom Blocks")

 * )

 */

class Customblock extends BlockBase implements ContainerFactoryPluginInterface {

  /**

   * The form builder service.

   *

   * @var DrupalCoreFormFormBuilderInterface

   */

  protected $formBuilder;

  /**

   * Constructs a new Custom Block instance.

   *

   * @param array $configuration

   *   A configuration array containing information about the plugin instance.

   * @param string $plugin_id

   *   The plugin_id for the plugin instance.

   * @param mixed $plugin_definition

   *   The plugin implementation definition.

   * @param DrupalCoreFormFormBuilderInterface $form_builder

   *   The form builder service.

   */

  public function __construct(array $configuration, $plugin_id, $plugin_definition, FormBuilderInterface $form_builder) {

    parent::__construct($configuration, $plugin_id, $plugin_definition);

    $this->formBuilder = $form_builder;

  }
/**
* {@inheritdoc}
*/
public static function create(ContainerInterface $container, array $configuration, $plugin_id, $plugin_definition) {
return new static(
$configuration,
$plugin_id,
$plugin_definition,
$container->get('form_builder')
);
}
/**
* {@inheritdoc}
*/
public function build() {
$form = $this->formBuilder->getForm('DrupaldummyFormExampleForm');
return [
'form' => $form,
];
}
}
Step 4: Place the Block
Certainly! Here’s a detailed guide on how to place your custom block in Drupal through the admin interface.
Placing A Custom Block in Drupal
1. Access the Block Layout Page
a. Log in to Your Drupal Admin Interface
- Ensure you are logged in with an account that has administrative privileges.
b. Navigate to the Block Layout Page
- In the Drupal admin toolbar, go to Structure.
- Click on Block layout.
This page shows you all the regions available in your current theme where blocks can be placed.
2. Locate Your Custom Block
Find the Custom Block:
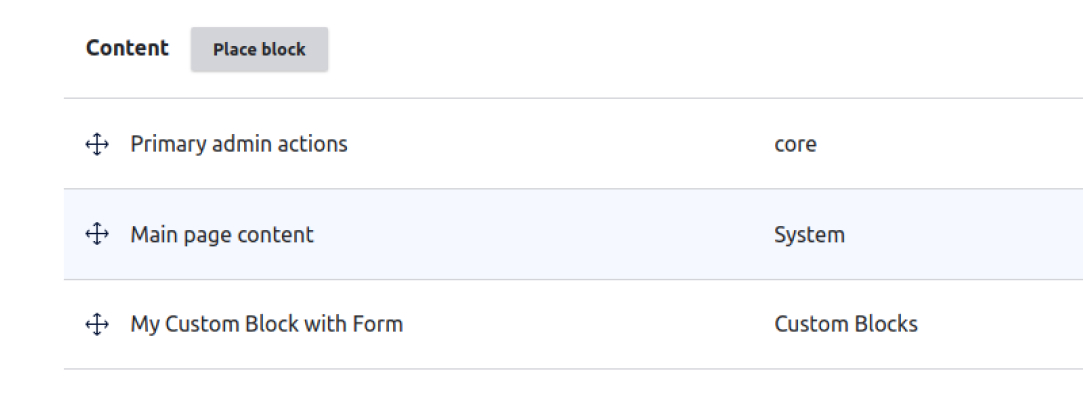
- On the Block Layout page, you will see a list of block regions and a section at the top labeled “Available blocks”.
- Look for your custom block in the list of available blocks. It will be listed under the “Custom” category or with the label you specified in the block plugin.
Example: Your custom block might be listed as “Custom Block” or whatever admin label you set.
3. Place the Block
a. Click on “Place block
- Next to your custom block, click the “Place block” button.
b. Configure Block Settings
- Title: Enter a title for the block if you want one to be displayed. If not needed, you can leave it empty or uncheck “Display title”.
- Visibility settings: Configure where and when the block should be visible. This includes:
- Pages: Set specific pages or patterns where the block should be shown or hidden.
- Content types: Choose content types where the block should be displayed.
- Roles: Specify user roles that should see the block.
- Languages: Display the block based on language.
c. Example Configuration
- Title: “My Custom Block Title”
- Pages: Show on all pages or specific paths (e.g., node/1).
- Content types: Display for content of type “Article”.
- Roles: Show to “Authenticated users” only.
d. Select the Block Region
- Choose the region where you want the block to be placed. Regions correspond to areas in your theme layout, such as the sidebar, content area, or footer.
e. Save Block Placement
- Click the “Save block” button to apply your settings and place the block in the selected region.
4. Verify the Block Placement
View the Frontend
- Go to the frontend of your site where the block should be displayed.
Check Block Appearance
- Ensure that the block appears in the correct region and displays the content as expected.
Adjust Placement (If Necessary)
- If the block does not appear as desired, you may need to return to the Block Layout page and adjust its settings or region.
Let’s Wrap It Up
In the Drupal ecosystem, Blocks are seen as an integral part. As a Drupal developer, it is necessary for you to know how to create and customize blocks. And we hope this blog might help you get useful pointers.
At LN Webworks, a Drupal development company, we’re committed to your success. Our expert team is here to provide personalized assistance. Contact us today to schedule your free consultation!
Author