AWS S3 Bucket File Upload In Drupal

1. Creating an AWS Bucket
- Log in to AWS Console: Go to the AWS Management Console and log in to your account.
- Navigate to S3: In the AWS Console, find and click on the “S3” service.
- Create a Bucket: Click the “Create bucket” button, provide a unique and meaningful name for your bucket, and choose the region where you want to create the bucket.
- Configure Options: Set the desired configuration options, such as versioning, logging, and tags. Click through the configuration steps, review your settings, and create the bucket.
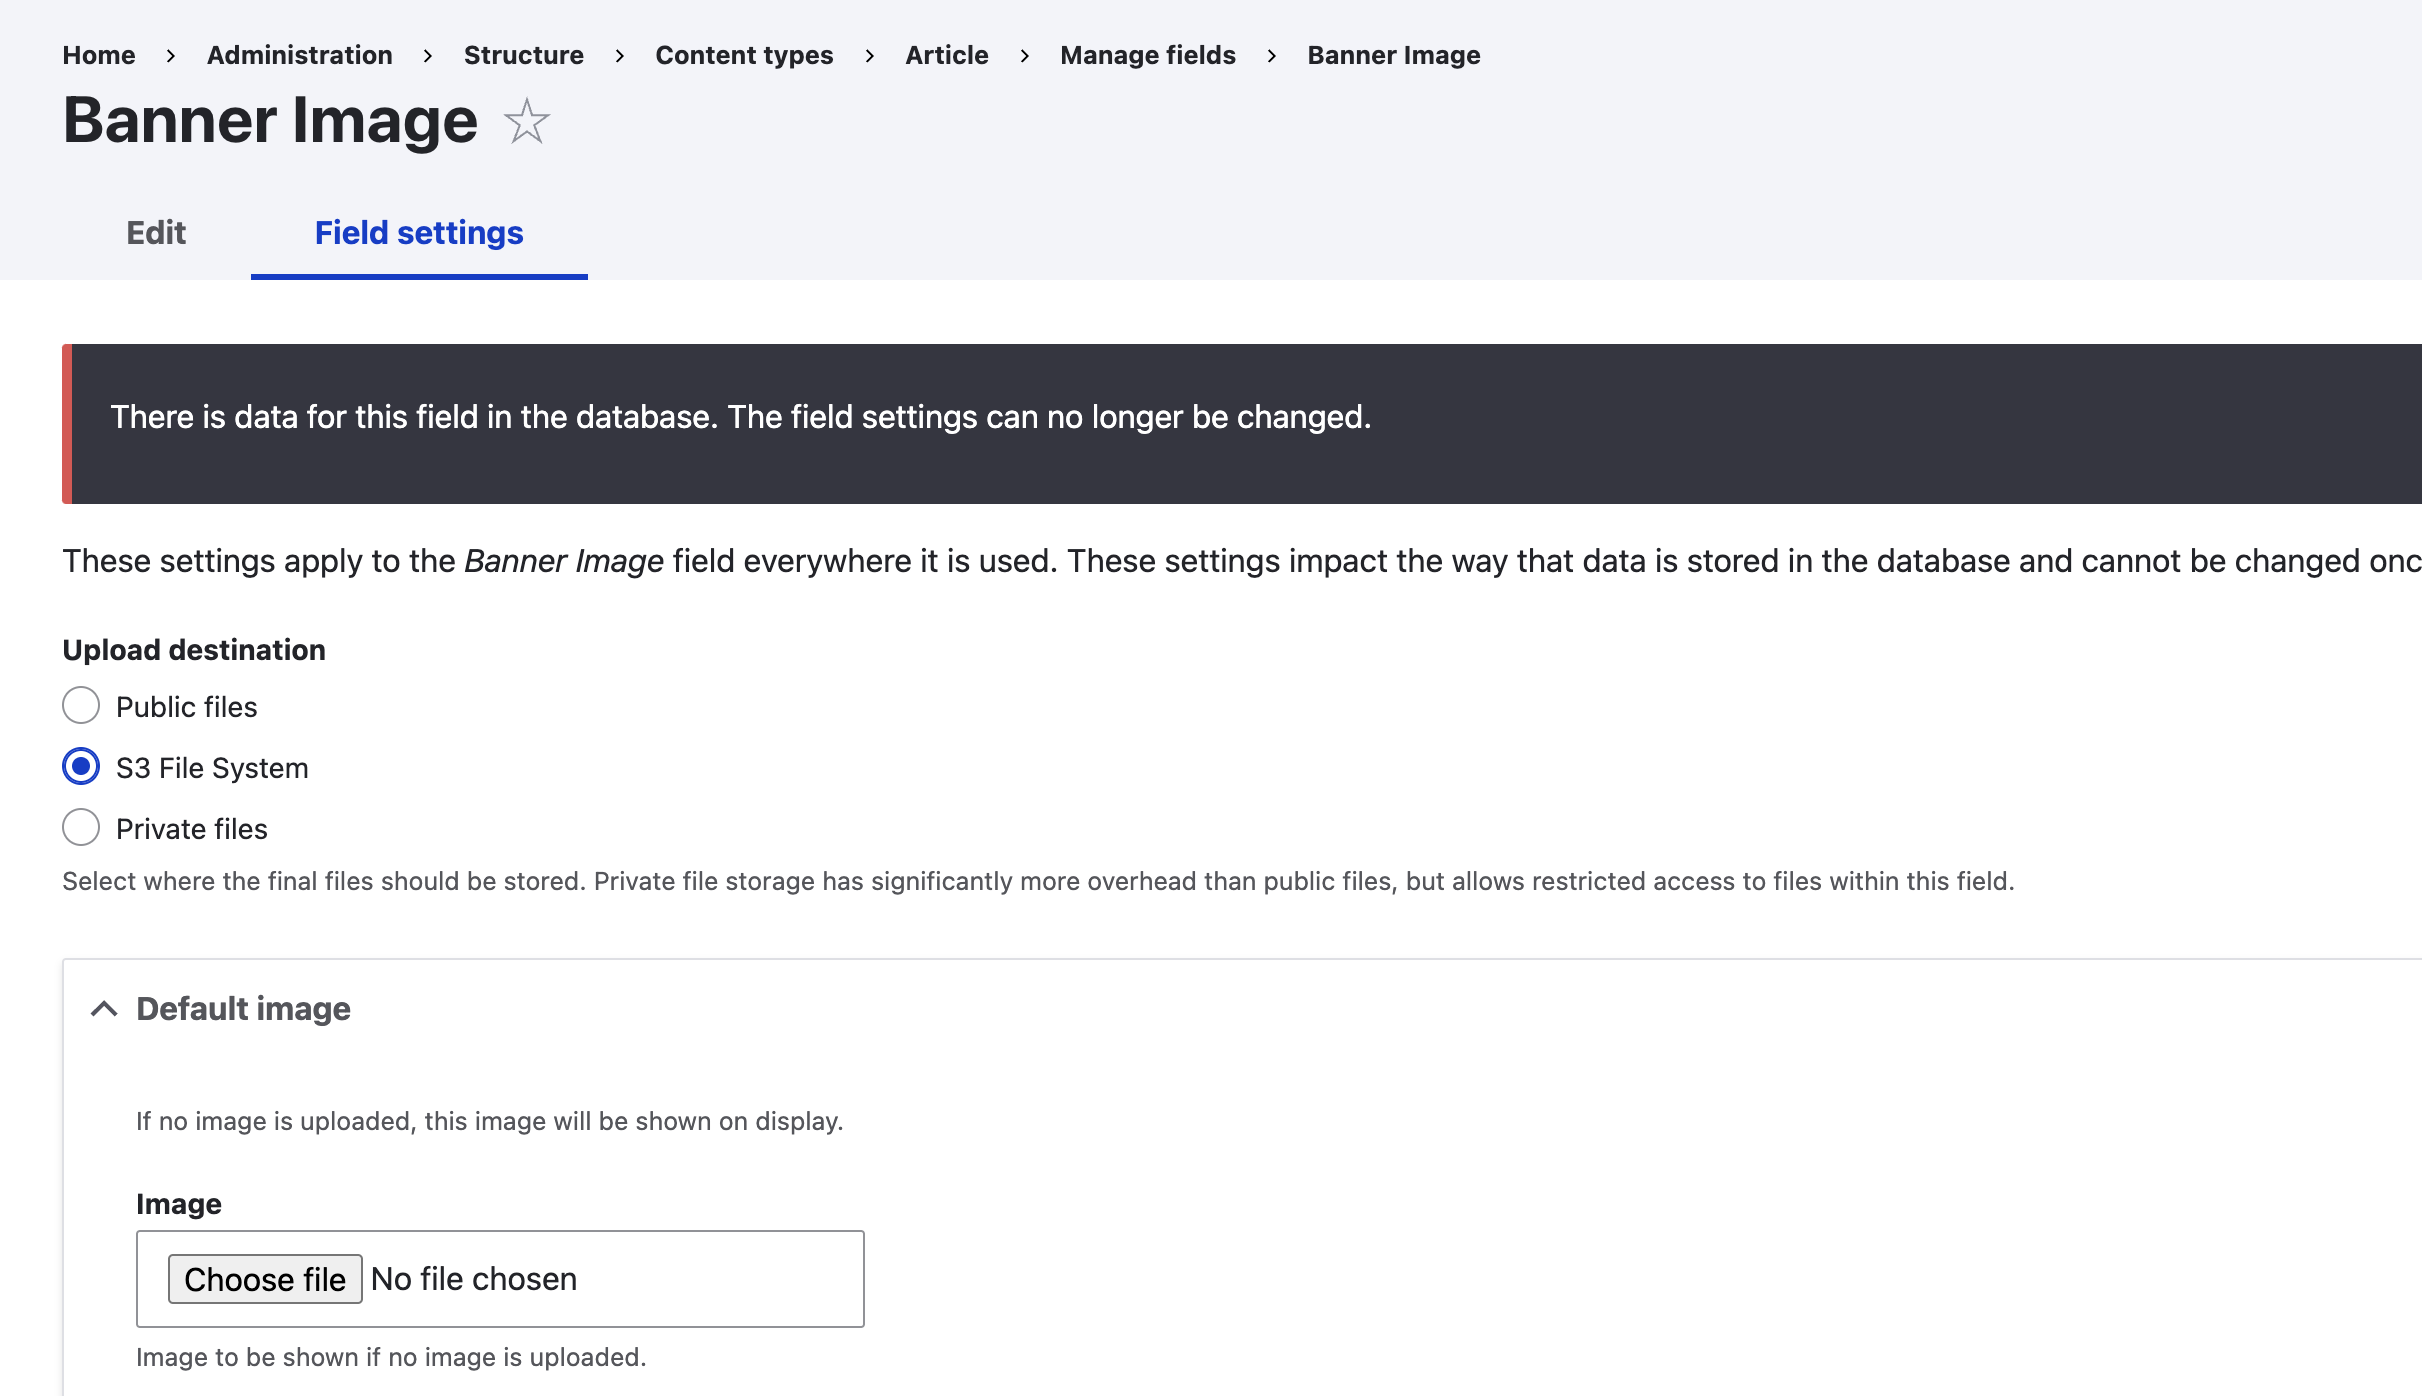
2. Uploading a Public Image
$settings['s3fs.access_key'] = "YOUR_ACCESS_KEY";

$settings['s3fs.secret_key'] = "YOUR_SECRET_KEY";

$settings['s3fs.region'] = "us-east-1";

$settings['s3fs.upload_as_public'] = TRUE;
- Install S3fs Module: Install the S3fs module from Drupal’s official project page.
- Configure Settings: Add the following lines to your
settings.phpfile, replacing the access and secret keys with your own: - Create Image Field: In your desired content type, create a new image upload field with the “s3” destination. Save the field settings.
- Upload Image: Create or edit a content type of your chosen kind, upload an image to the designated field, and save the content type.

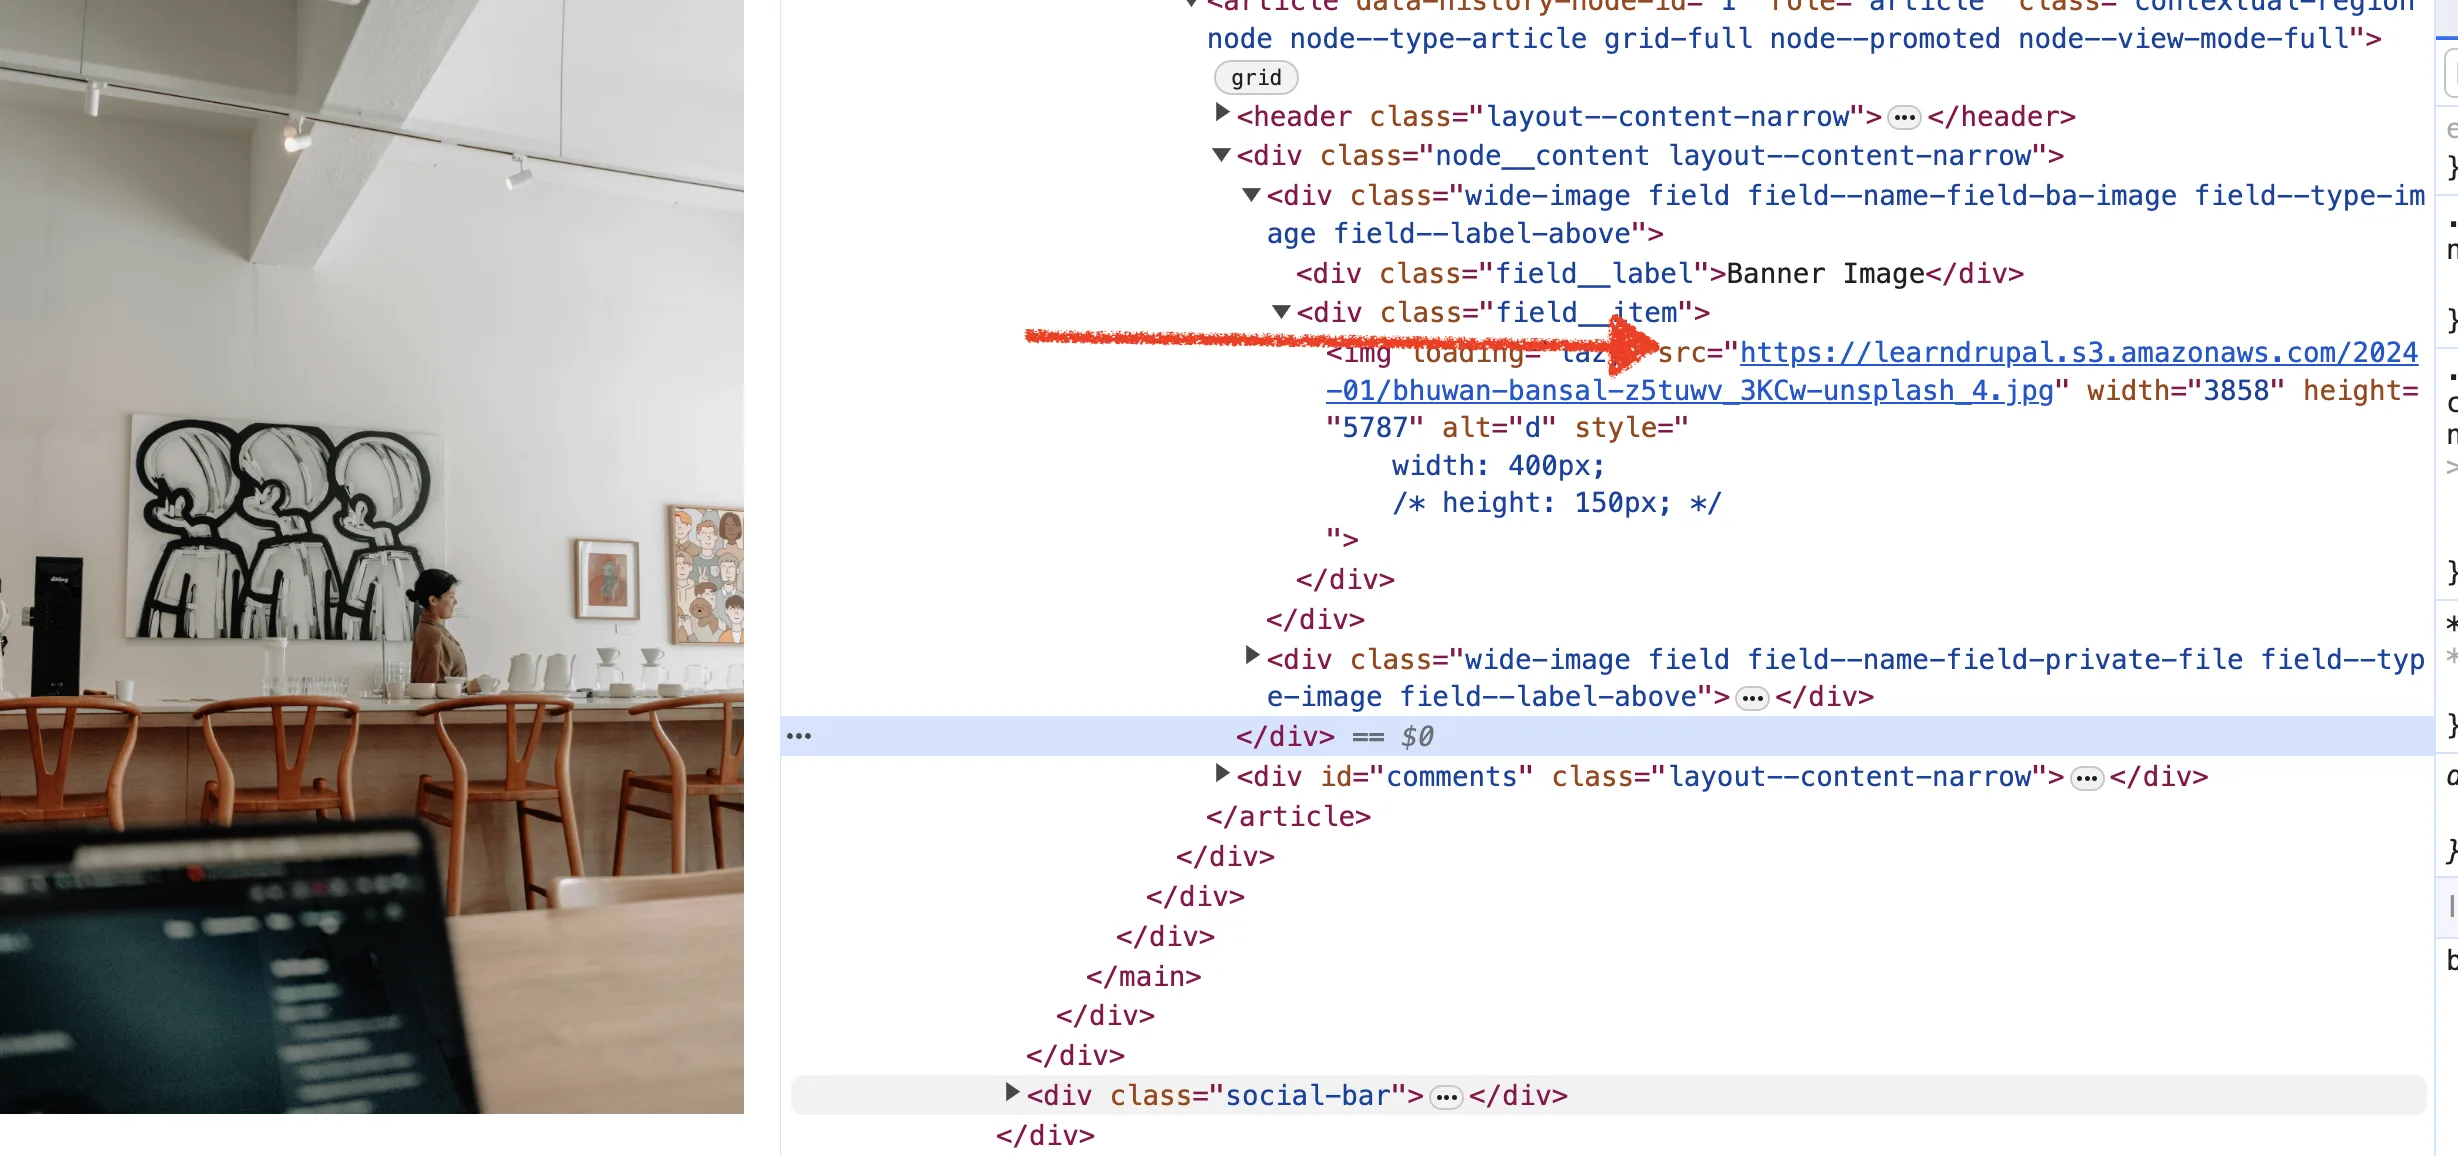
- Check Image URL: View the content type, inspect the image element, and note the S3 bucket URL. It should look like:
https://YOUR_BUCKET_NAME.s3.amazonaws.com/PATH/TO/IMAGE.jpg.
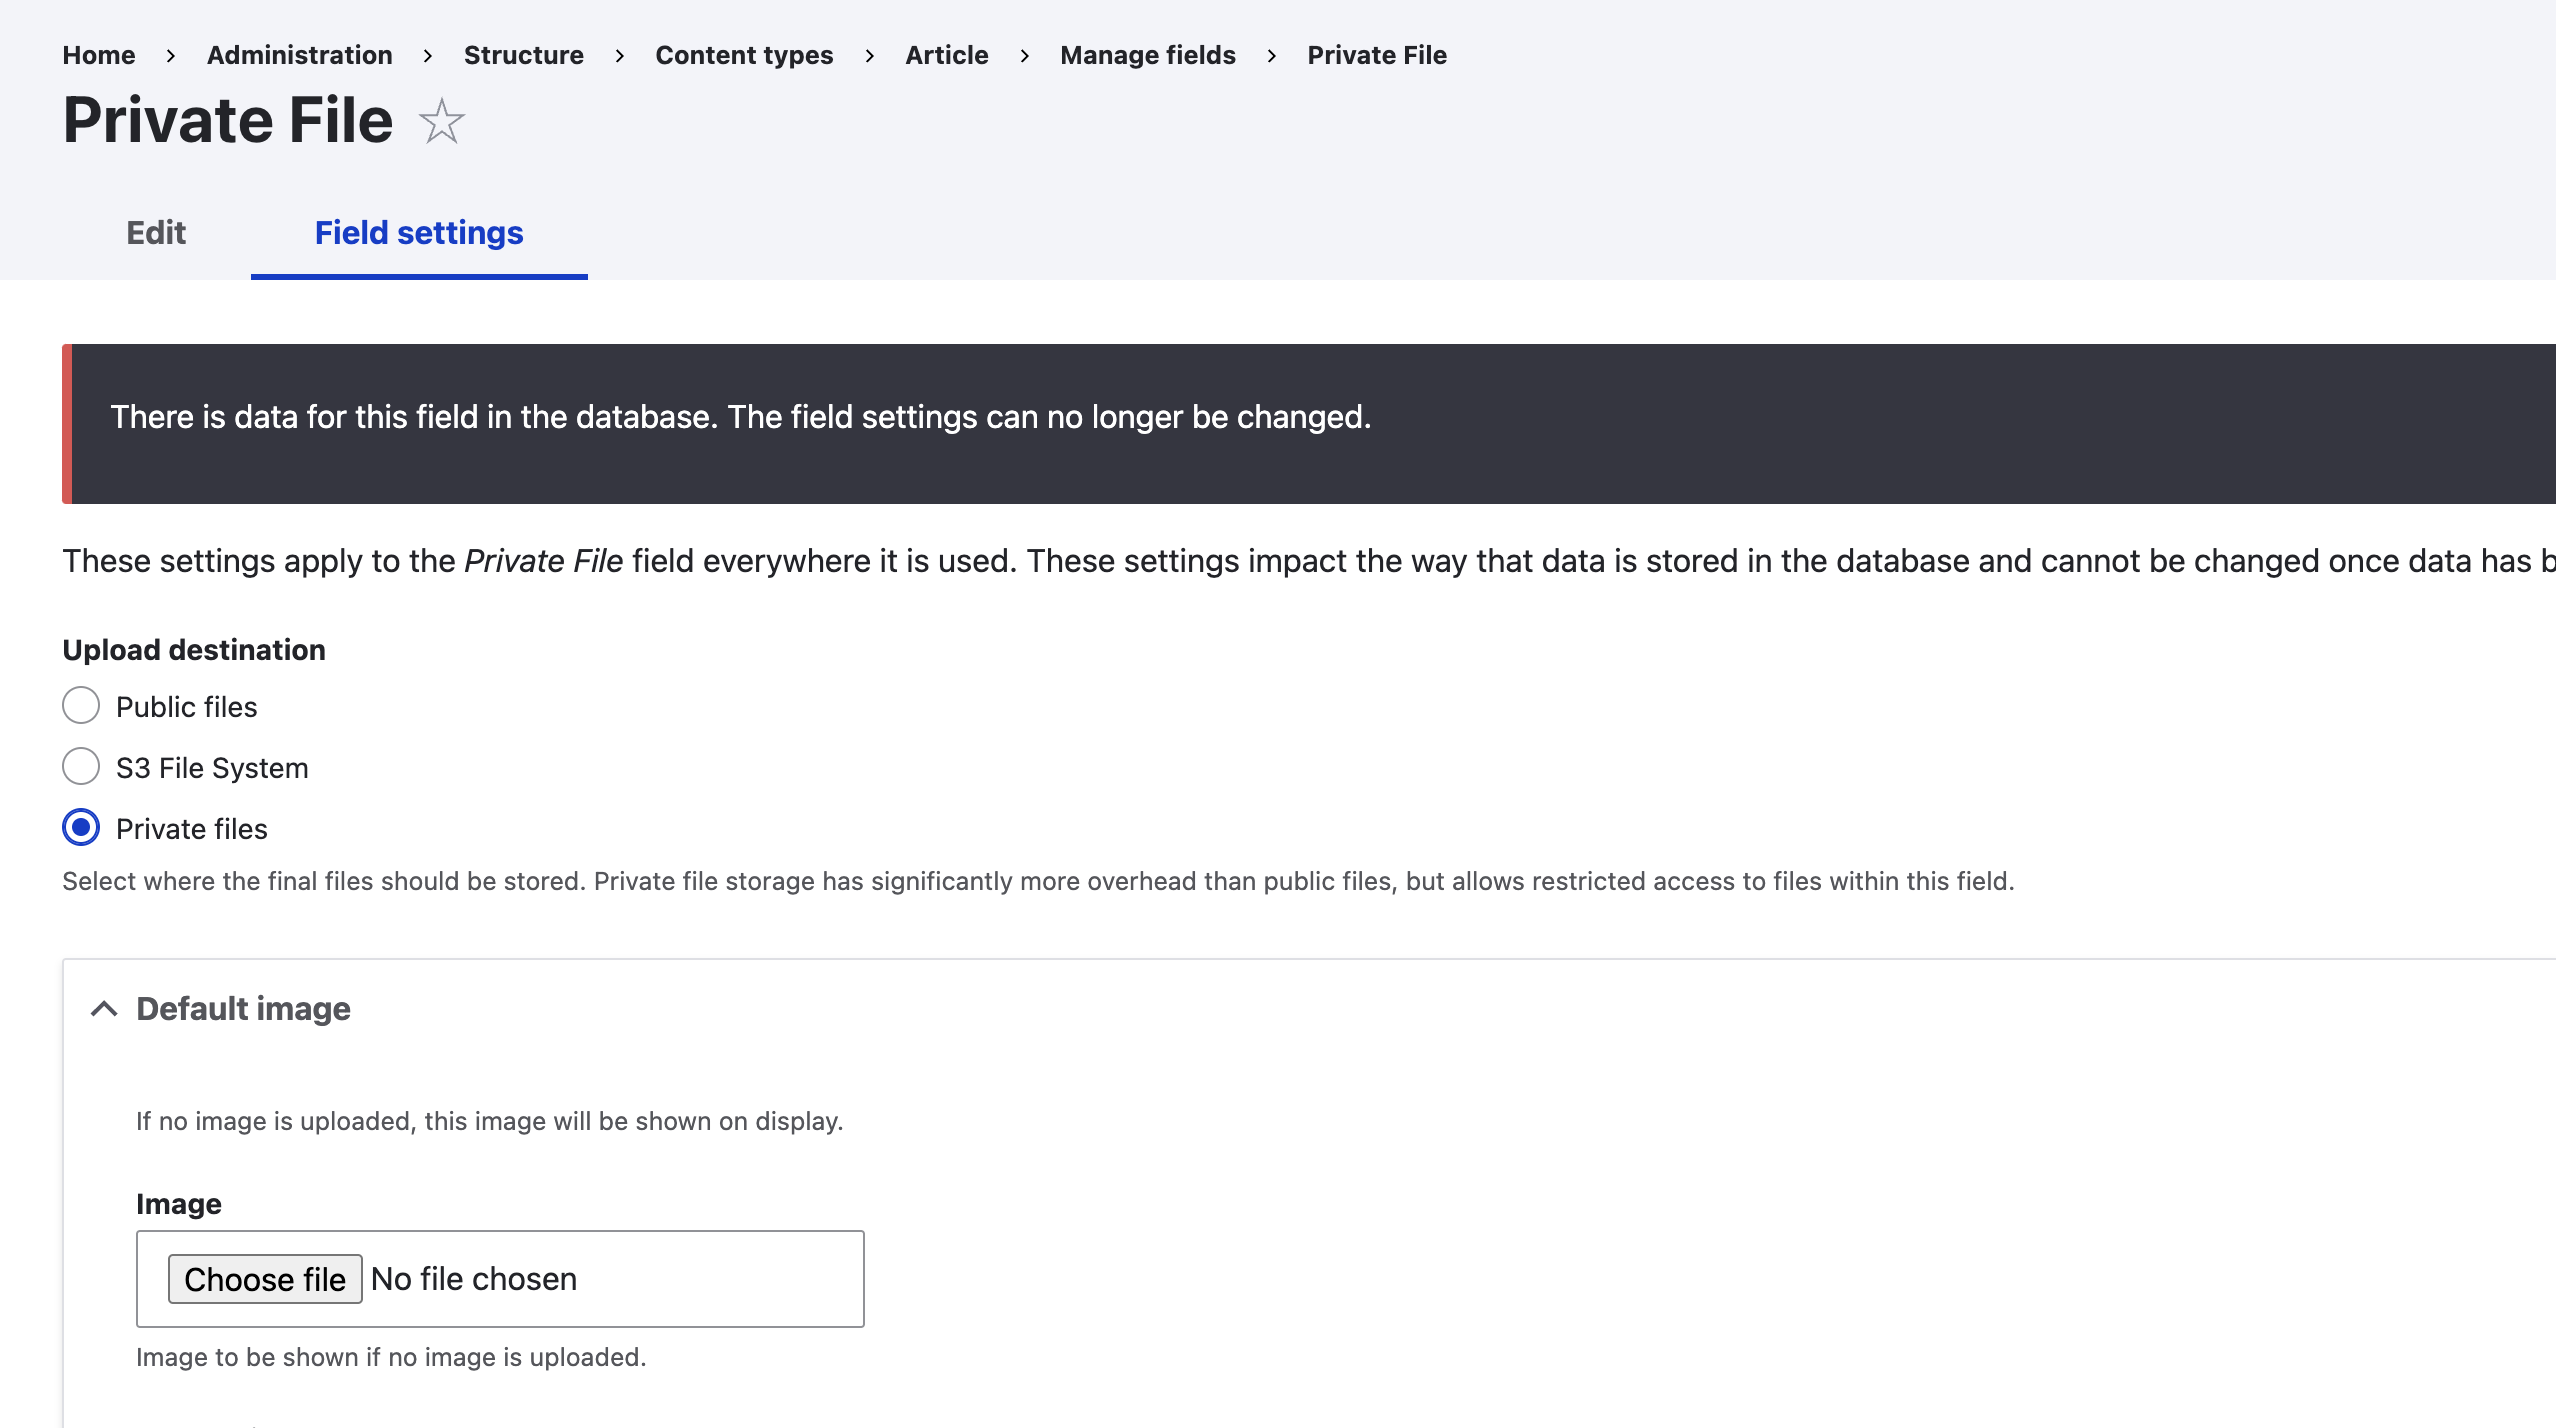
3. Uploading a Private Image
$settings['s3fs.upload_as_private'] = TRUE;

$settings['file_private_path'] = $app_root . '/../private';
- Update Settings.php: Add the following lines to your
settings.phpfile: - Configure Content Type: Go to the content type where you want to add a private image field. Create a new image field and set the destination path to “private.” Save the field settings.
- Upload Private Image: Upload an image to the newly created private field in the content type.
- Check Private Image URL: View the content type, and inspect the image element. The URL should look like:
http://localhost:1234/system/files/PATH/TO/PRIVATE_IMAGE.jpg. Note that the image is stored privately on S3 without revealing the bucket path.

By following these steps, you can effectively upload both public and private images to an Amazon S3 bucket in Drupal, enhancing your website’s scalability and security.
Let’s Wrap It Up!
The article guides users through creating an AWS S3 bucket, uploading public and private images to Drupal, and configuring settings for improved website scalability and security.
LN Webworks can help you with the process. We are known for our incredible Drupal development services across the world. As a trusted Drupal company, our primary focus is the utmost satisfaction of our clients. So, reach out to us today and experience the magic we create.