How To Create Your First AI Model Without Any Prior Knowledge: A Beginner’s Guide

Teachable Machine by Google is a fantastic tool that empowers anyone to create machine learning models without requiring any coding experience. It’s especially perfect for beginners, providing a straightforward and intuitive way to dive into the fascinating world of artificial intelligence.
I particularly wanted to use it to build a model distinguishing between healthy and unhealthy foods. As someone who doesn’t have any background in AI or its concepts, I find this tool to be incredibly user-friendly and accessible. It takes the intimidation out of technology, allowing me to focus on what truly matters—my project.
The process is engaging and fun, as I explore various food images and see if I can train the model to recognize the differences accurately. With Teachable Machine, I can experiment freely, learning from my mistakes along the way. It’s a unique opportunity not just to learn about AI but also to apply it in a practical context that resonates with my interests. I can’t wait to see if I can get it right!
Step-By-Step Guide On How To Create Your First AI Model
Step 1: Access the Teachable Machine
To get started, visit the Teachable Machine website. The user-friendly interface will guide you through the model creation process.
Step 2: Choose Your Model Type
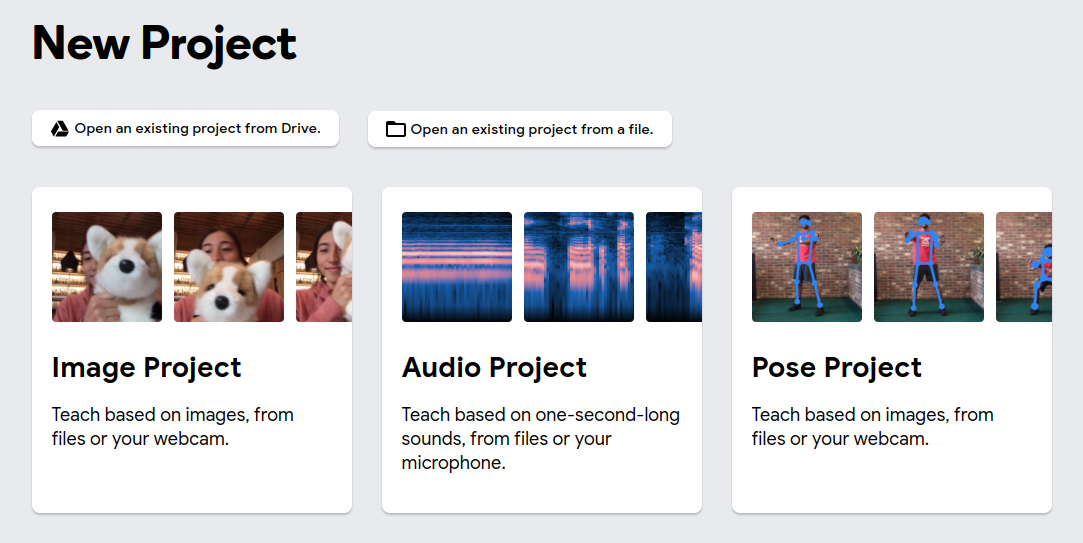
Teachable Machine offers three types of projects.

Image Project: For classifying images.
Sound Project: For recognizing sounds.
Pose Project: For detecting poses using your webcam.
Choose the project type that excites you the most. For my needs, I opted for the IMAGE project, as it was the best fit for what I wanted to accomplish.
Step 3: Set Up Your Classes
- Click on “Get Started” under the Image section.
- You will see two classes by default (e.g., “Class A” and “Class B”). You can rename these classes to fit your needs. as for me healty and unhealty
- Click the camera icon to begin capturing images for each class, or you can upload photos directly from your PC, phone, or cloud storage. Be sure to take or upload multiple images to improve accuracy.

Step 4: Train Your Model
Once you’ve collected enough samples for each class, click the “Train Model” button. The training process will begin, and you can watch the progress. This step is crucial as it helps the model learn the features of each class.

You can adjust the training parameters to suit your preferences.

Step 5: Test Your Model
After training, you can test your model right away! Use the interface to see how well it recognizes your classes. Make sure to try out different images to evaluate their accuracy. If the results aren’t satisfactory, you can always go back, collect more data, and retrain the model till you find it useful as for me I tweaked it 2 to 3 times in total

Step 6: Export Your Model
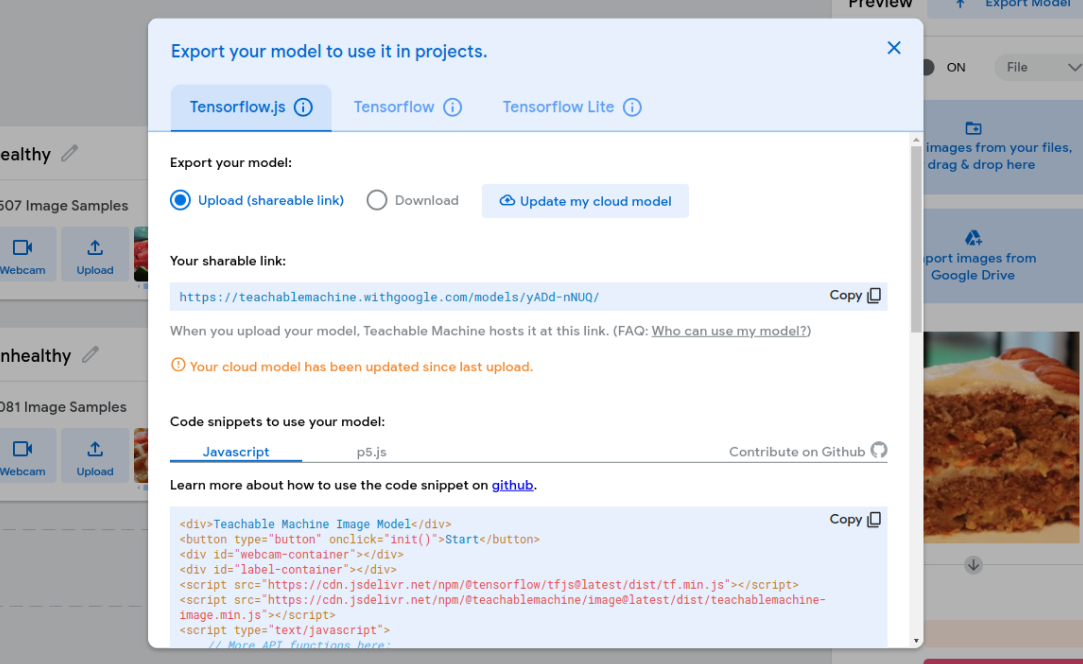
Once you’re happy with the performance, you can export your model for use in other applications. Click on the “Export Model” button, and choose your preferred format (e.g., TensorFlow.js or a downloadable file).

Step 7: Share Your Creation
Teachable Machine makes it easy to share your models with friends or the community. You can generate a link to share or even embed your model on a website.
Conclusion
Creating your first AI model with Teachable Machine is an exciting and educational experience. You don’t need any prior knowledge to get started—just a willingness to experiment and explore! Dive into the world of AI and see what ideas you have you can create with this!
Wanted to expand your AI Projects? Get in touch with LN Webworks now, our AI development expert team are here to support you in creating innovative solutions customized to your requirements.
